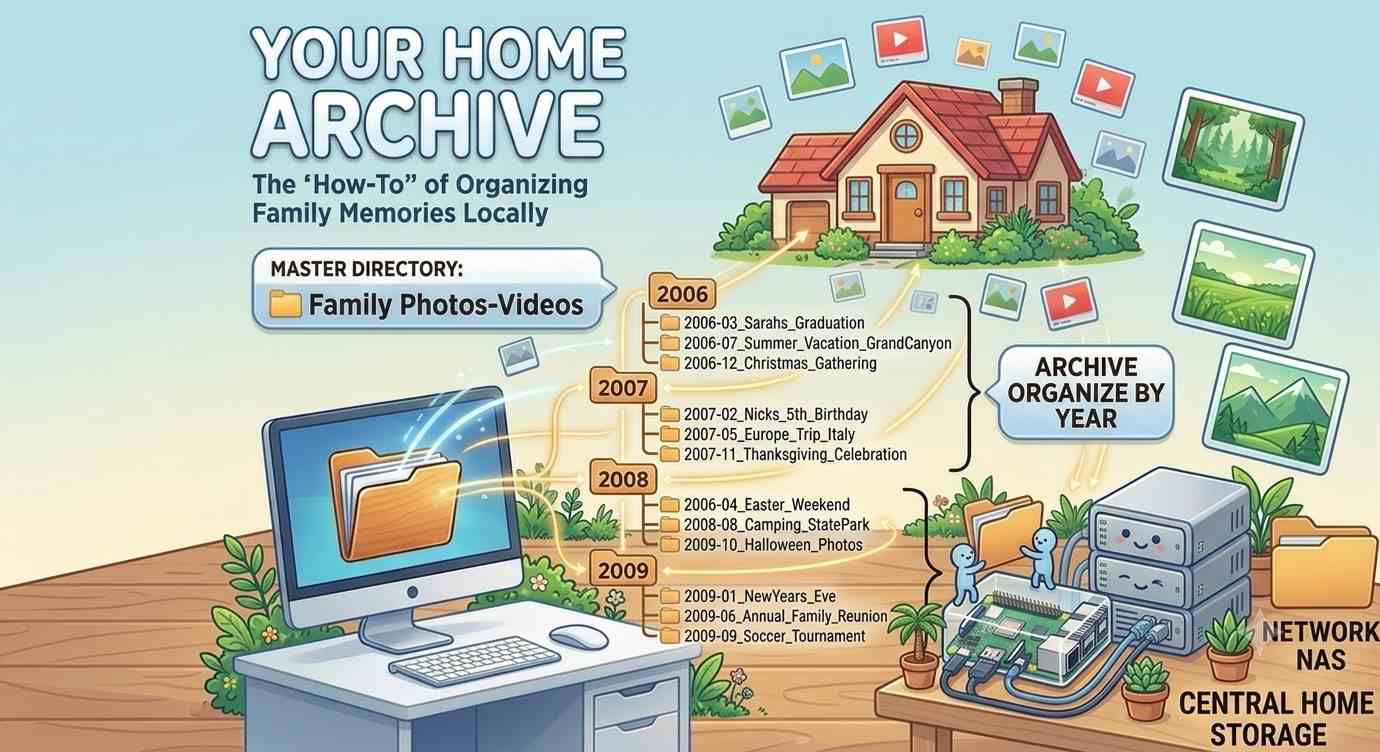
Commercial cloud storage services offer an undeniable luxury. Companies invest millions in high-end data centers, automated hardware redundancy, and military-grade security patches so that you don't have to think about any aspects of security, integrity and availability. However, this convenience masks a painful truth: you are renting your memories.Over a decade, maintaining a multi-terabyte personal archive on premium tiers can cost hundreds of dollars due to perpetual and creeping subscription fees. If you miss a payment, your access is cut off, definitely not abruptly, though unless you pay, eventually you lose your hard collected memories. Furthermore, changes in privacy policies can feel like your data is no longer entirely yours. For those uncomfortable with recurring costs, building a Raspberry Pi 5 Network-Attached Storage (NAS) offers a liberating alternative. By transitioning to a local server, you pay a one-time hardware cost, keep your data physically inside your home, and completely avoid the "subscription" trap.
Why Raspberry Pi ?
There are multiple hardware platforms available. Choosing a Raspberry Pi over other commercial off-the-shelf (COTS) hardware platforms comes down to several distinct advantages, primarily driven by ecosystem size, software support, and overall cost.
Unmatched community support: Millions of developers share open-source libraries, troubleshooting steps, and pre-built code.
Rapid prototyping: You can find existing software packages or device drivers for almost any sensor or peripheral instantly.
Operating system maturity: Raspberry Pi OS is highly stable, frequently updated, and based on standard Debian Linux.
Note : This DIY blog requires a fair amount of Technical skills. best if executed by experts or even student doing engineering, as part of academics.
Building a Self-Hosted Cloud: Setting Up a Raspberry Pi Server
Our goal for this project is to build a reliable, localized cloud storage server using a Raspberry Pi. By moving your data off third-party platforms and hosting it locally, you gain full sovereignty over your files, eliminate monthly subscription costs, and drastically minimize external security risks. Here is exactly how we will prepare the hardware and implement smart power management for maximum efficiency.
Broadly the blog is divided into 2 parts.
Part 1 covers the hardware setup requirements and guidelines.
Part 2 is about software to be installed and used.
Part 1 - Hardware
Physical Setup and Thermal Management
Where and how you position your Raspberry Pi directly impacts its performance and vaguely longevity too.
Placement: Position the Pi as close to your primary home router as possible. A direct Ethernet connection is always preferred over Wi-Fi for storage servers to ensure maximum data transfer speeds and low latency. Direct ethernet is comparatively more secure than a wireless communication.
Ventilation: Ensure the Pi lives in a well-ventilated space. While a Raspberry Pi can technically run bare, heavy read/write operations will trigger thermal throttling. Adding an active cooling fan or a robust passive heatsink is highly recommended. There are many standard cooling fans available in the market to support dynamic on/off of fan too.
Power Delivery and Redundancy
Your server needs a reliable power source to prevent data corruption during unexpected power fluctuations. Usually you can power the board directly from a main wall socket using the official 27W USB-C power supply to guarantee stable voltage under load.
The Resilient Route: Run the Pi through a dedicated battery pack or a specialized Pi UPS (Uninterruptible Power Supply) HAT. This setup adds critical hardware support, keeping your personal cloud online and preventing filesystem damage during sudden local power outages.
Initial Provisioning vs. Headless Management
You do not need dedicated peripherals cluttering your desk permanently just to run a home server.
1. The Initial Bootstrap: For the first-time boot and operating system configuration, hook the Pi up to a keyboard, mouse, and display. If you do not have a spare monitor lying around, simply use an available HDMI port on your home TV.
2. Going Headless: Once the initial configuration is complete and the network interface is active, disconnect the peripherals. From this point forward, the server will operate completely "headless." You can easily monitor system health, update packages, and manage files remotely from your laptop using Secure Shell (ssh).
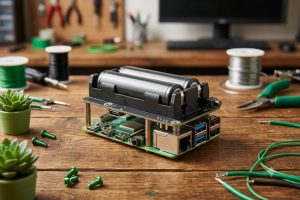
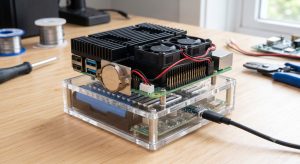
Parts to
purchase
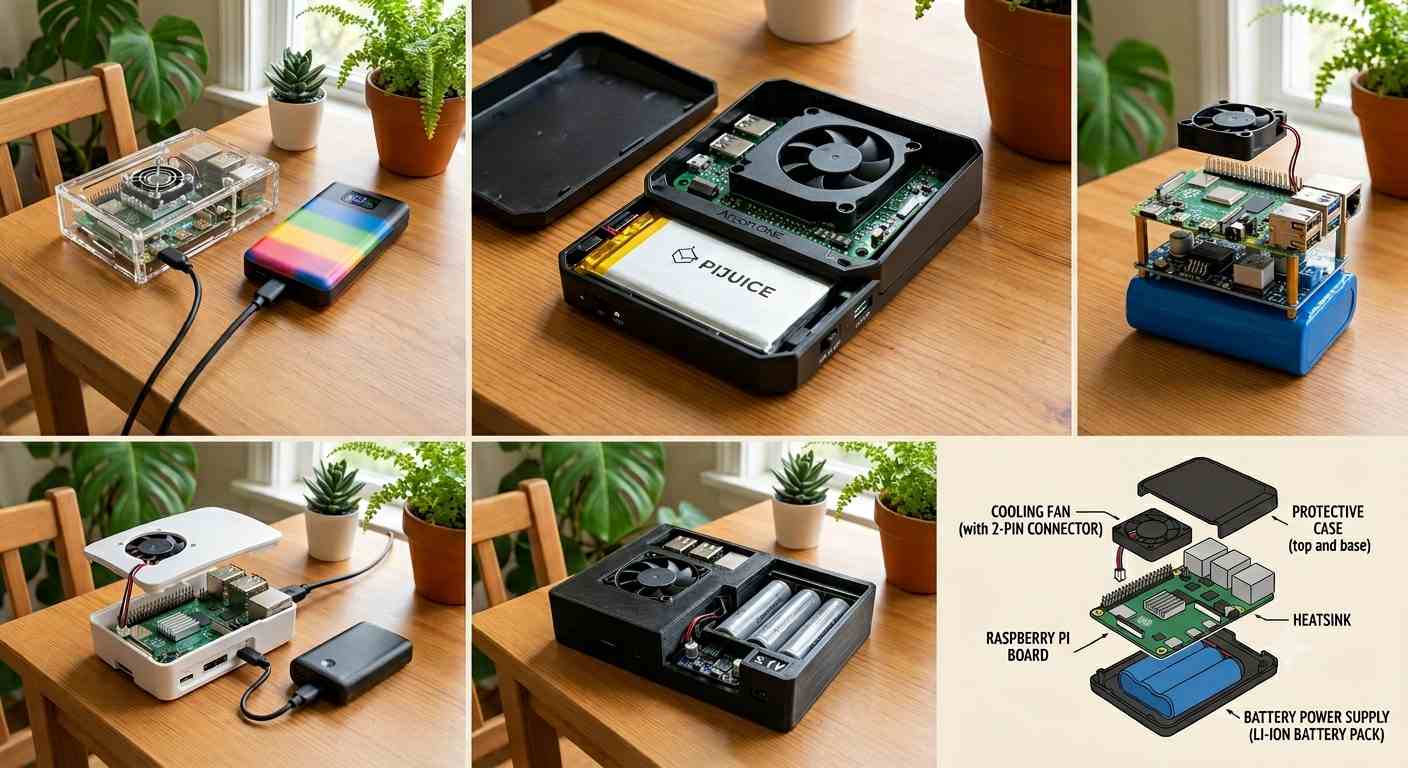
Typical sample setup images
The below is common hardware list,
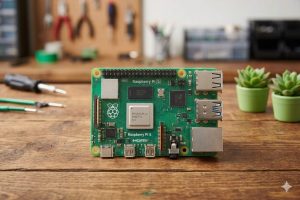
1. Raspberry Pi 5 8GB RAM.
2. Raspberry Pi 5 18650 Battery UPS HAT.
3. Official Raspberry Pi 5 Case with Fan Red/White. Any case or fan is good to go with.
4. Official RTC Battery for Raspberry Pi 5 for automatics shutdown and restart functionality.
5. Storage: A high-speed MicroSD card (32GB+ Class 10/A2) for the base operating system, with an NVMe M.2 1TB SSD coupled with a PCIe HAT for lightning-fast cloud data storage. Check with other HATs you wish to purchase to coexist. You can stack it up you will need a set of GPIO header extenders (stacking headers) and brass standoffs.
The MicroSD card can be a slower one like class 4 or class 10 instead of V30 to host only the Linux OS. You can save some cost if we opt for a slower speed one. Class 10 is a standard buy. The high speed M.2 NVM SSD Card supports a write speed of 500+ mbps. This is good enough to stream videos and view images.
6. Power Adapter: An official 27W USB-C PD power supply to provide stable voltage to the Pi and your attached peripherals. Buy only official Pi power adapter.
7. Ethernet Cable: A physical Cat6 cable connected directly to your home router for stable, low-latency network transfer speeds.
Ensure to buy official parts for power supply and UPS alone. The cables, coolings fans or fins, case can be from any vendor. Does not matter much. If we don't wish an auto shutdown and restart functionality then we don't need to buy 18650 Battery UPS HAT. You can also shutdown and restart Pi manually using ssh on a headless system.
Part 2 - Software
Setting Up CasaOS on Raspberry Pi 5
The absolute best operating system to pick for a Raspberry Pi 5 home cloud server is Raspberry Pi OS Lite (64-bit).
Because CasaOS is actually a cloud dashboard that runs on top of an existing Linux environment, the Lite version is ideal. It has no heavy desktop interface, which saves maximum RAM and CPU power for your Docker containers and personal cloud storage.
Flash the Base OS
1.Download and launch the official Raspberry Pi Imager on your computer. Select Raspberry Pi 5 as your device.Under Choose OS, navigate to Raspberry Pi OS (Other) and select Raspberry Pi OS Lite (64-bit).Click the Settings gear icon to pre-configure your Wi-Fi/Ethernet, set a username/password, and enable SSH.Flash the OS onto your microSD card. Lets use NVMe drive mainly for storage purposes.
2. Boot and Connect : Insert the storage medium into your Raspberry Pi 5 and power it up. Find the Pi’s IP address from your local network router. Open your computer's terminal and connect to the Pi via SSH:ssh username@your_pi_ip_address
3. Update the System : Ensure the operating system repository and packages are fully up-to-date before installing anything new:

4. Run the One-Click CasaOS Installer
CasaOS provides a simple automated script that installs everything needed, including Docker components.
Run this single command

Wait a few minutes for the script to download dependencies, install container architecture, and launch the web interface.
5. Access the Cloud Dashboard
Once the installer finishes, it will print your local URL.Open any web browser on your home network and go to http://your_pi_ip_address.Create your primary admin account to access your new, sleek personal cloud dashboard!
From here, you can install apps like Nextcloud, Immich or Plex with a single click.
Mount the M.2 NVMe Drive in CasaOS
Mount the M.2 NVMe Drive in CasaOS
Because CasaOS includes built-in smart storage management, you do not need complex Linux terminal syntax to mount external drives.
a). Connect the Hardware: Safely slot your M.2 SSD into your Raspberry Pi 5 NVMe HAT or external USB-C enclosure and boot up the Pi.
b). Open CasaOS Storage Manager: Log into your CasaOS dashboard (http://your_pi_ip_address). In the top-left corner, find the Storage Status widget and click the three dots (or Settings icon) to open Storage Manager.
c).Format and Mount: You will see your unmounted NVMe drive listed under "Disks". Click Format(choose ext4 for native Linux performance).
d). Create Storage Space: Once formatted, CasaOS lets you combine it or use it as an independent storage path. CasaOS will automatically mount it under /media/Storage/ (or a similar auto-generated path).
Auto-Sync Photos & Videos From Your Smartphone
( Optional )
To create an automated, private alternative to Google Photos or Apple iCloud, the absolute best tool to use inside CasaOS is Immich (or Nextcloud Memories). Immich provides a sleek mobile application with background auto-backup.
Step 1: Install Immich on CasaOS
Open the App Store on your CasaOS home screen.Search for Immich and click Install. (If it is not in the default store, you can add the BigBearAppStorethird-party repository to CasaOS, or install it via the Custom App section using a Docker Compose file).
Step 2: Point Immich to your NVMe Storage
Before hitting install (or by editing the app settings after installation), look at the Volume/Directory mapping. Change the default upload path from the Pi's micro SD card to your newly mounted NVMe directory (e.g., map /media/Storage/Photos to the container's internal data directory). This ensures your heavy media files save directly onto the fast SSD.
Step 3: Configure the Smartphone App
Download the Immich app from the Google Play Store or Apple App Store.Open the app and type in your local CasaOS server address: http://your_pi_ip_address:port (Immich usually runs on port 2283).Log in with the admin credentials you created during the Immich container setup.
Step 4: Turn on Auto-BackupGo to the app settings and select Backup.Select your primary phone albums (e.g., DCIM, Camera, Videos).
Turn on Background Backup and Backup on Wi-Fi only to keep your phone perfectly synced every time you walk into your house!
Cybersecurity - Local security Checklist for CasaOS on Pi 5
1. Secure the Base Operating System
Change Default Credentials: Never leave default usernames or passwords. During the initial Raspberry Pi Imager flashing step, create a strong, unique password for your user account.
Disable Root Password Login: Ensure the root user cannot be accessed directly over the network.
Update Constantly: Keep the OS patched against vulnerabilities. Set up automatic security updates by installing the unattended-upgrades package on the Pi:

2. Harden SSH (Secure Shell) Access
Since SSH gives full command-line control over the Pi, it is a primary target.
Disable Password Authentication: Switch from passwords to SSH Keys. This ensures only your specific laptop/computer can log into the Pi via terminal.
Disable Root SSH: Edit the SSH configuration file (/etc/ssh/sshd_config) and ensure PermitRootLogin no is set.
Change the Default Port: Change the SSH port from the standard 22 to a random high-number port (e.g., 2244) to stop automated local network scanner scripts.
3. Implement a Local Firewall (UFW)
A firewall blocks all incoming network traffic except for the exact ports you specifically allow.
Install the Uncomplicated Firewall:

Allow only CasaOS, Immich, and your custom SSH port, then block everything else:

4. Never Open Ports on Your Home Router (No Port Forwarding)
a). The Danger: Traditional remote access involves "Port Forwarding" on your home router, exposing your Pi directly to the public internet. Doing this allows global hackers to constantly scan and attempt to brute-force your CasaOS login.
b). The Solution: Keep your router ports completely closed. Use a secure Overlay Mesh VPN like Tailscale or TwinGate. These tools create an encrypted tunnel directly to your Pi, allowing you to access CasaOS and upload phone photos from anywhere in the world without exposing your network to the internet.
5. Isolate Apps with Docker Best Practices
a). Avoid Root Containers: When installing custom apps via CasaOS, check the app settings to ensure they do not run with unnecessary system privileges (privileged: true should be disabled unless absolutely mandatory).
b). Keep Apps Updated: Check the CasaOS App Store regularly and click "Update" on your containers (like Immich or Nextcloud) to patch application-layer vulnerabilities.